Microsoft 365 Shared Email Access
In Microsoft 365 there are two methods of shared email access: Shared Mailboxes and 365 Groups.
A shared mailbox makes it easy for a group of people to monitor and send email from a public email alias like HelpDesk@stockton.edu. When a person in the group replies to a message sent to the shared mailbox, the email appears to be from the shared address, not from the individual user. You can also use the shared mailbox as a shared team calendar. Below you'll find additional information on how to access shared mailboxes and groups along with other tips and tricks that you may find helpful.
365 Groups
A 365 group works as a subscription-based inbox and calendar which you can opt-in to receive emails from. A group has no "sent" folder nor can it perform a mail merge, instead it receives emails and distributes them to members; group membership is managed by group owners. Email groups that you are a member of are automatically populated in both the Outlook client and Outlook Web for you to view.
To view messages from your 365 Groups in Outlook Web, simply scroll down your Folders menu on the left-hand of the page. At the bottom is the Groups directory, which can be collapsed or expanded and includes any groups you're a member or owner of.
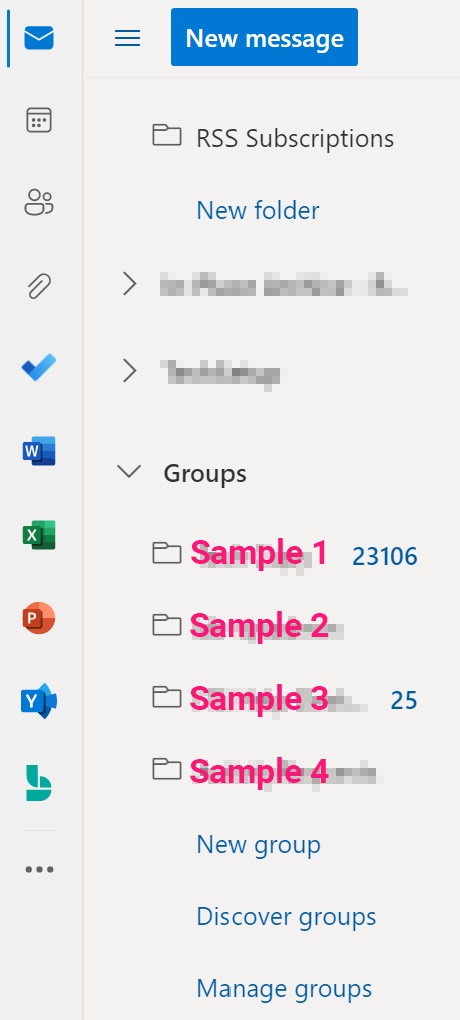
To view messages from your 365 Groups in the Outlook desktop client, simply scroll down your Folders menu on the left-hand of the application. At the bottom is the Groups directory, which can be collapsed or expanded and includes any groups you're a member or owner of.
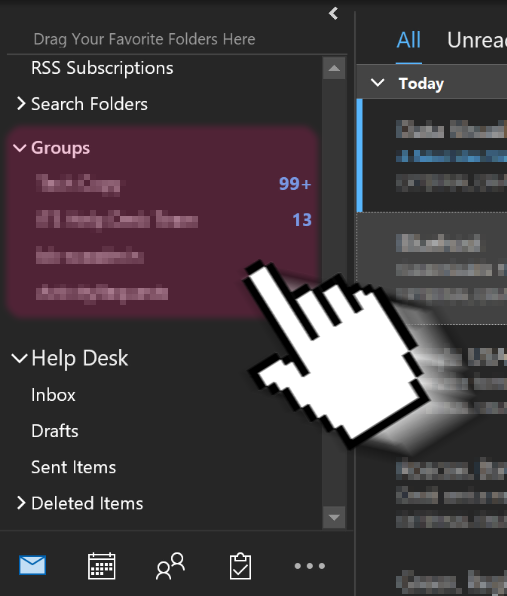
By default, group members access emails sent to the group inbox by navigating to the group among their outlook folders. Members may "Follow" or subscribe to their group and have those email messages forwarded to their own inbox.
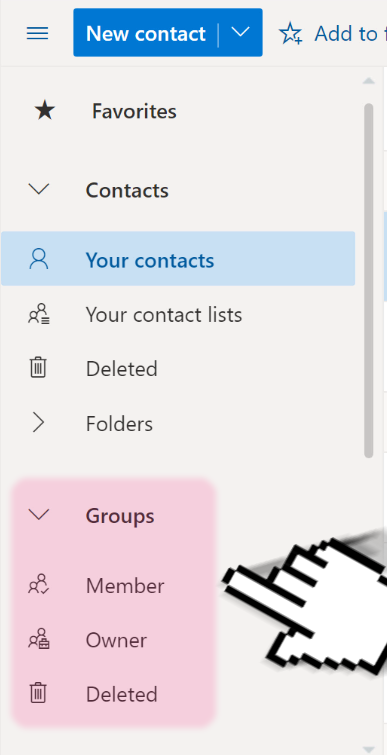
First, log in to Outlook Web and click on the Contacts icon.
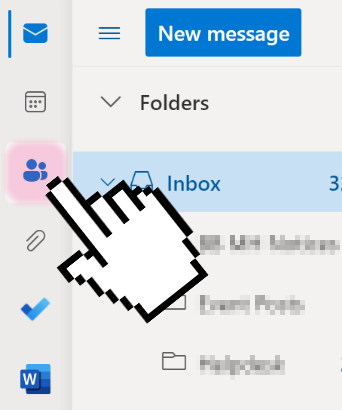
Next, find the Groups section in the left-hand menu. Select Member or Owner to filter which groups you see.
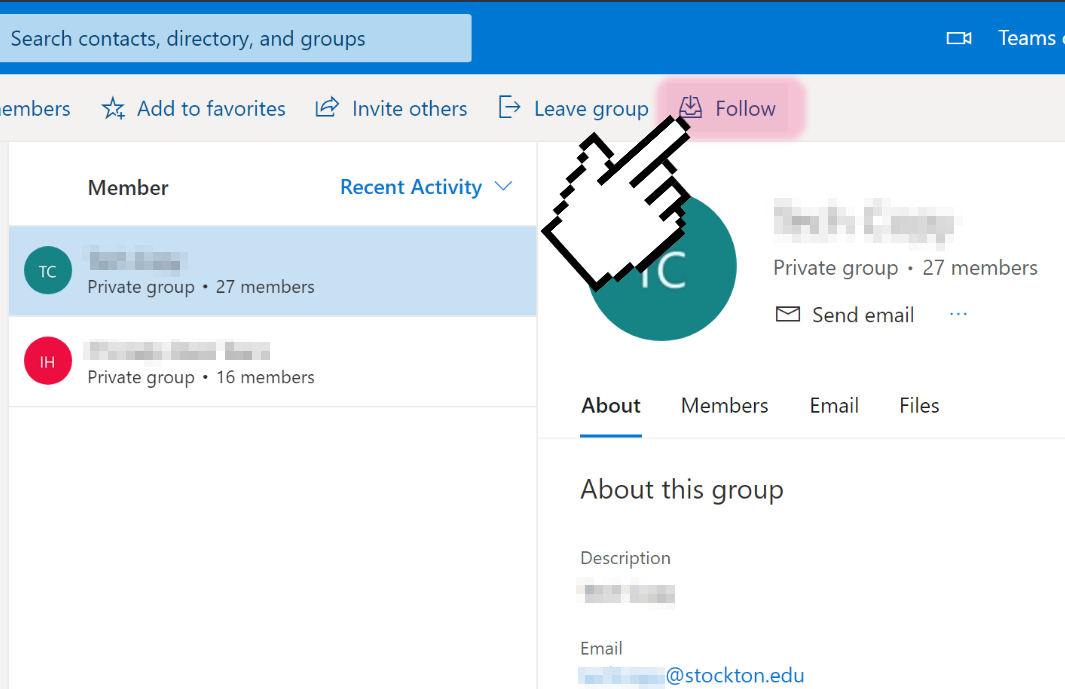
Select a group and then click on the Follow button to begin receiving email messages sent to the group into your own inbox.
As a group owner, you may add or remove group members at any time through the Outlook Web interface.
First, log in to Outlook Web and click on the Contacts icon.
Next, find the Groups section in the left-hand menu. Select Owner to filter which groups you see.
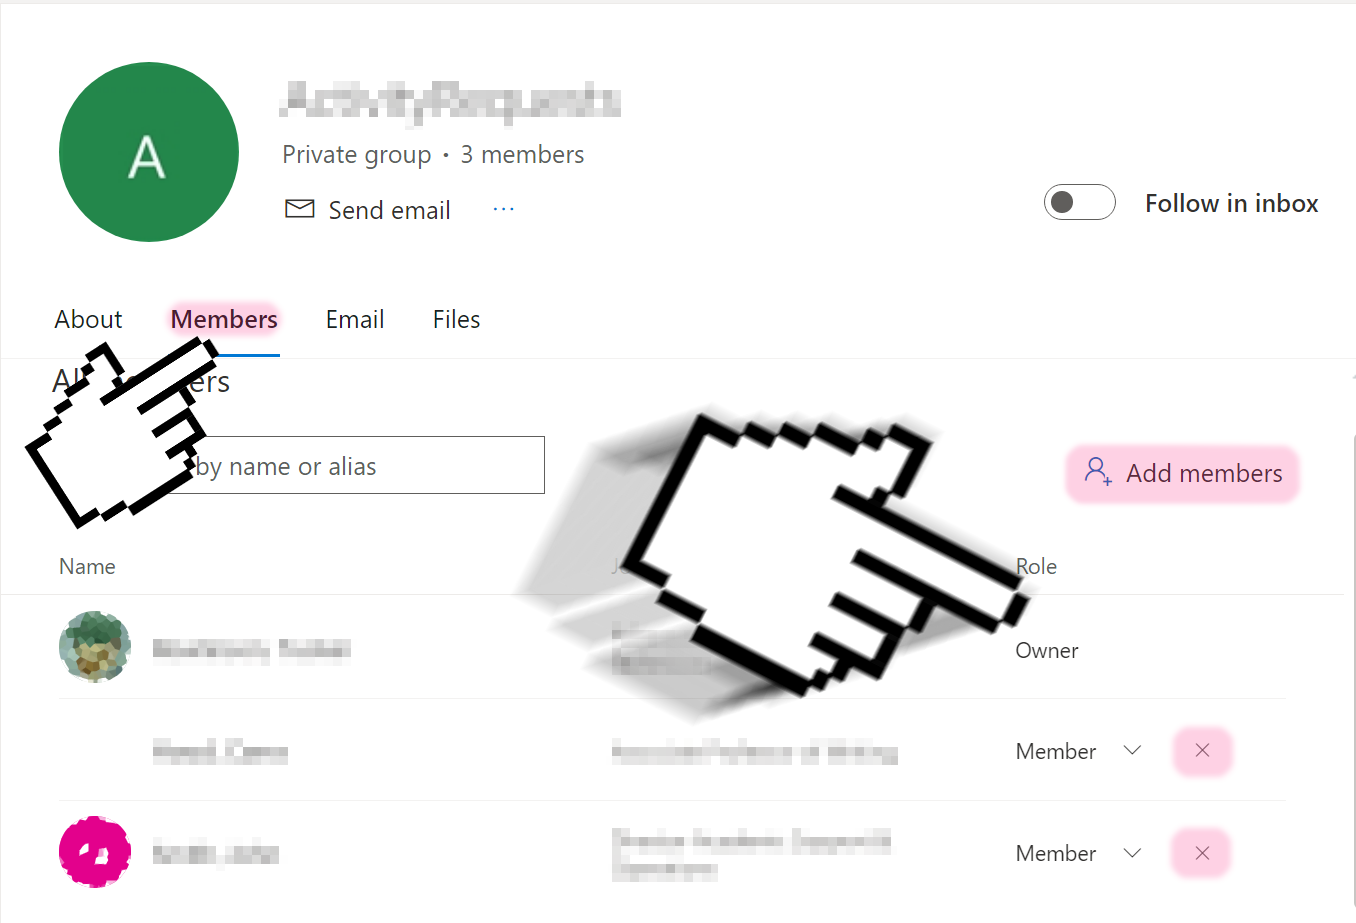
Select a group to modify the members of, then click on the Members tab. From there you may add members with the "Add members" button and remove existing members with the "X" button adjacent to their role.
Shared Mailbox
A shared mailbox is not designed for direct log on but instead access is delegated to mailbox members. If you use the Outlook desktop client to access your University email shared mailboxes that you are a member of are automatically populated by Outlook for you to use.
Open a shared mailbox in Outlook Web
- Log in to Outlook Web using your own mailbox email address and password.
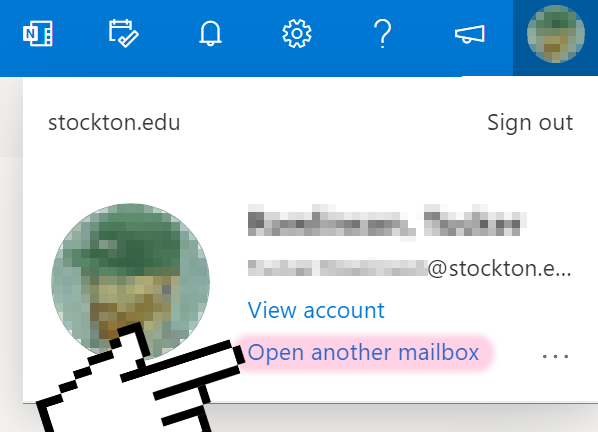
- Click on your name in the upper-right corner of the window and click Open Another Mailbox.
- In the Open Other Mailbox box, enter the email address of the mailbox that you want to open and click Open. The mailbox will open in a new window.
Troubleshooting:
If the mailbox doesn’t open and you get the following error message instead:
"You do not have permission to open this mailbox. Contact technical support for your
organization for access or for more information." you'll need to make sure that you were granted full access to that mailbox.
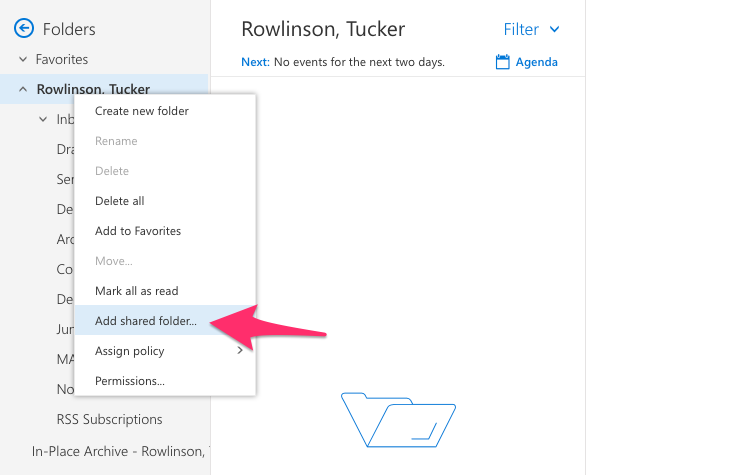
- Right-click on your account name shown in the left-hand folder menu. Next, click on
“Add shared folder…”
- Enter the address for the account you’d like to add. In this example I’ve added an
account we use in ITS to schedule hardware setups. Once the account is chosen, click
“next” to continue.
- The newly-added account will display in your left-hand folder menu.
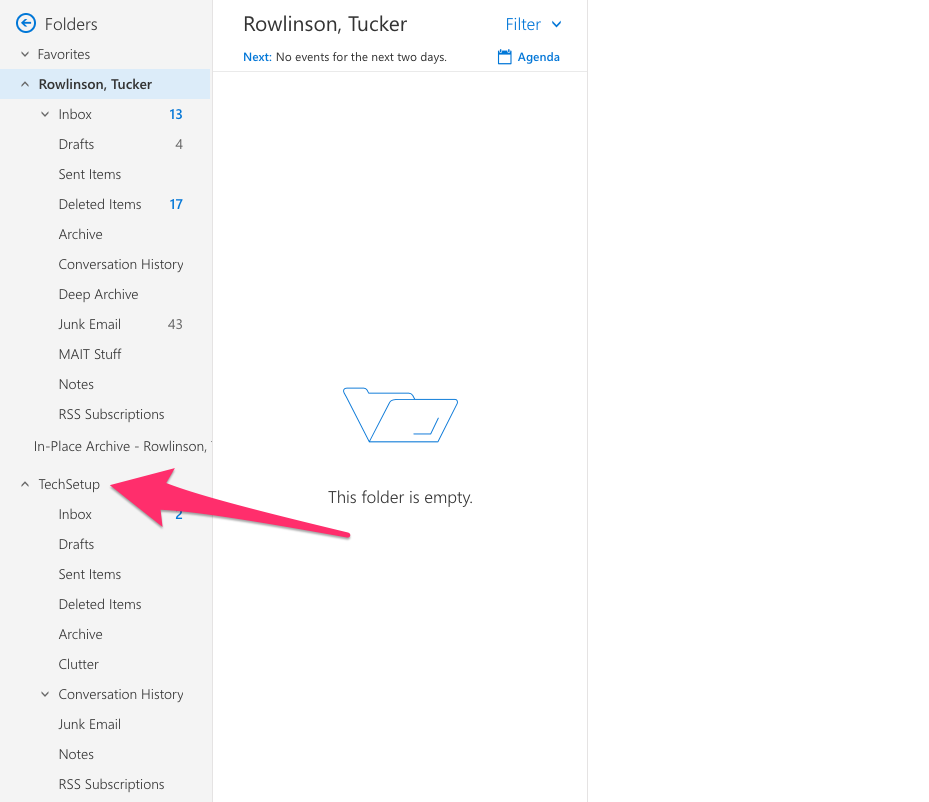
Depending on how recently your account was given permissions for the shared account, you may need to wait 10-15 minutes before being able to fully access e-mails and calendars.
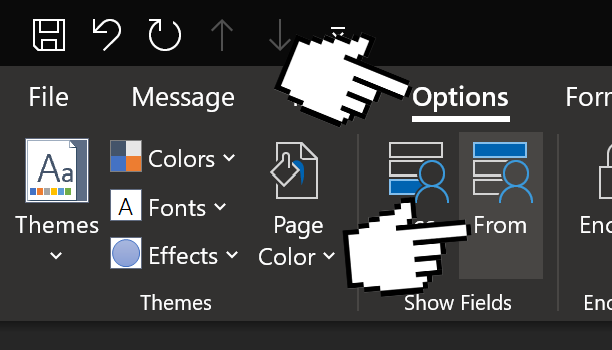
To send an email from an alternative address that you have permissions for, first you must begin creating a new message and select the Options tab on the ribbon menu. Click on the From button to enable selecting your Send From drop-down.
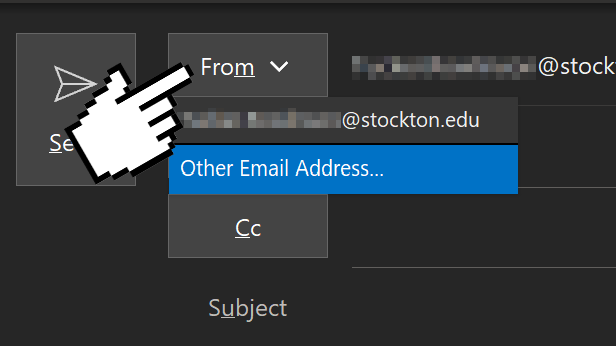
Click on the newly-visible From button to select an alternate send address, if this is your first time using this feature you'll need to click on the "Other Email Address" option and enter the address you wish to send from. If you have permission to send from this address, it will appear in the drop-down menu for future messages.
Adding a Shared Mailbox in Outlook for Android & IOS App
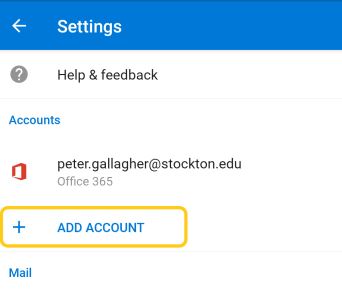
1. From inside the Outlook for Android & IOS app start by going into the settings menu and selecting the "add account" button.
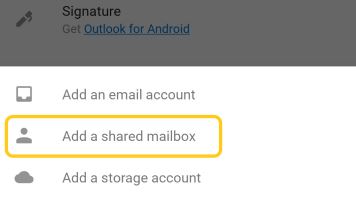
2. Select "Add a shared mailbox" from the pop up menu.
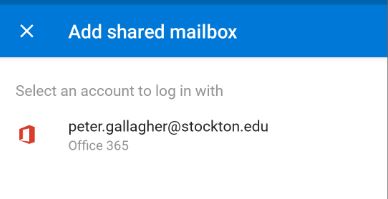
3. Select an account to authenticate into the shared account with to continue.
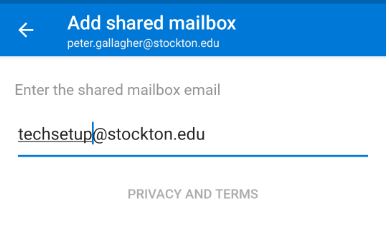
4. Enter the name of the shared mailbox and hit continue.
5. The account will be added to your Outlook app.
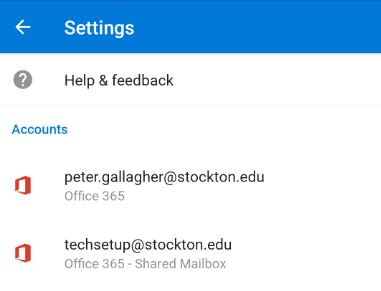
To view the account click on the folder/account drawer to swtich between accounts.