Column Snippet
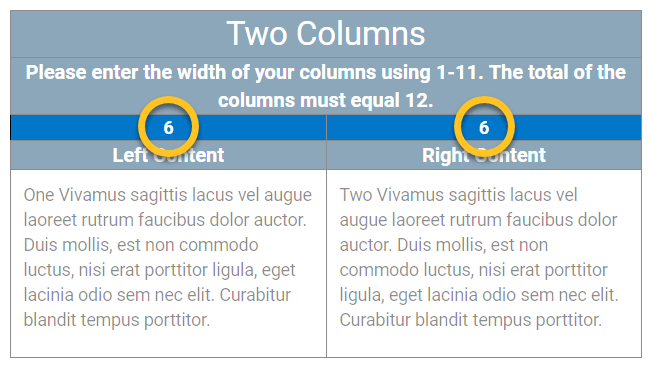
Use the column snippets to arrange content in variable-width columns.
Adjust the column widths by changing the number values so that when combined, they equal precisely 12.
You can nest column snippets to create unlimited page layouts. The columns made will automatically resize and stack on smaller screens, such as phones and tablets, for a fully responsive design.
Three column snippets are available, a "Two Column," "Three-column," and "Four Column" snippet.
 Adjust the column widths by changing number values. When combined the values must
equal 12.
Adjust the column widths by changing number values. When combined the values must
equal 12.
When to use the column snippet
Use this snippet to enhance the visual layout of content for larger screen sizes like laptops and desktops. The contents of the columns will stack from left to right on smaller screens like tablets and phones.
Usability Guidelines
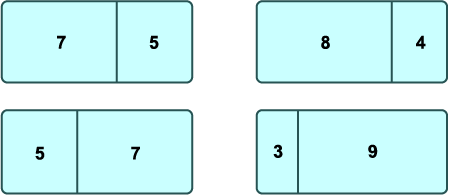
Here are some popular column size configurations for the two column snippet:
To move content from one column cell to another, manually cut and paste the text between column cells.
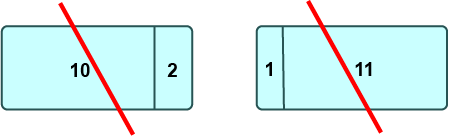
Size combinations like (10 + 2 ) or (11 + 1) are valid but may squeeze content so that it becomes difficult to read.
If the column sizes do not add up to twelve, the snippet will default to equal width columns (6 + 6).
The columns will stack on smaller screens. It's important to understand the order of the stacking when using the snippet.
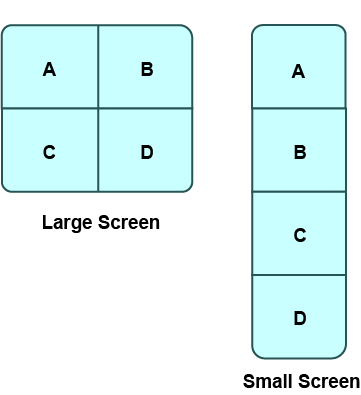
Test how your content stacks by making your browser window smaller when reviewing your pages. This will ensure your content flows correctly across all screen sizes.
Implementation
- Open a page in Modern Campus CMS and enter editing mode.
- Place your cursor where you would like a column row created.
- From the toolbar, select the snippet icon
 , which resembles a puzzle piece.
 - From the list of snippets, select the Two Column, Three Column, or Four Column snippet.
- Press the Insert button.
- Enter your column sizes or leave the default values for equal column widths.
- Enter your content into each table cell.
- Save and preview.