Getting Started with Modern Campus CMS
If you are new to Modern Campus CMS or need a refresh, this section covers the basics such as logging into the system, making simple edits, and publishing your changes live to the website.
Logging in:
To edit any page, login by clicking the DirectEdit link (copyright symbol at the bottom of the page).
If you have editing permissions for that page and have logged in successfully, you will then be taken to the page's Edit View. From there, you will be able to edit any editable regions you have permission to edit and will also be able to navigate to other pages and information that you have access to using Modern Campus CMS.

Quick Start Video - Learn how to login to a web page and make text and link changes.
The Interface:
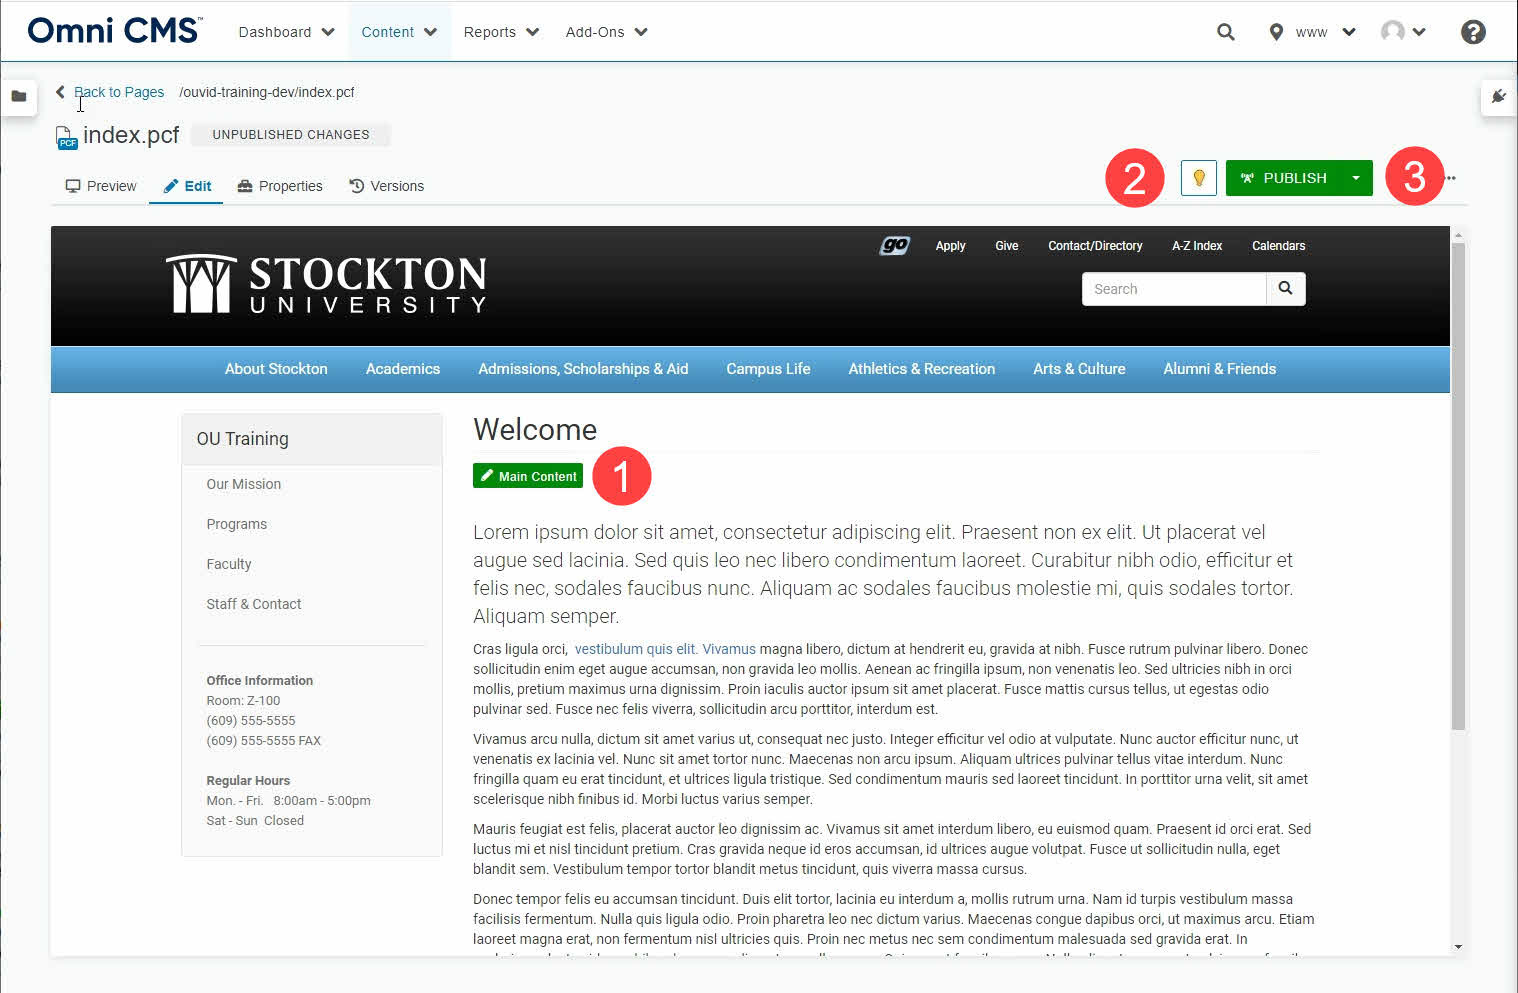
-
Editable Regions:
Indicates an editable area on the page. Click this button to show the editor toolbar. -
Status Indicator:
The checked in/out icon is represented by a light bulb. -
Publish button:
Publish changes from staging to production.
Check In/Check Out
The Check In/Check Out system prevents multiple contributors from working on content at the same time and overriding each other’s changes.
The Check In/Check Out Icons
The checked in/out icon is represented by a light bulb and reflects the state of an Modern Campus CMS page or file.
![]()
An unlit light bulb indicates that the page is checked in and can be checked out for editing by any user with the proper permissions.

A lit light bulb indicates that the page is checked out to your account.
A red lock indicates that the page is checked out to another user. Hovering over the lock icon will reveal whom has the page checked out.
Check In / Out Video - Learn about the Check In / Out system.
Once you are done editing a page, you should in most cases check it back in. A Checked Out page cannot be edited by another user.
You can check in a page in the following ways:
Click on the lit (yellow) light bulb
If you have a page checked out to you, the light bulb icon will be lit (yellow). You can check the content back in by clicking on the lit light bulb icon. Doing so will dim the light bulb icon (black outline) and check the page back in.
You can find the light bulb icon in the following places:
- When in Edit View for a page you are working on. The icon is located in the Page Actions Toolbar.
- In the Page List Area you can see the lit light bulb icon to the right of the file name.
-
In the File Navigation Sidebar. You can see the lit light bulb icon to the left of the file name.
Dashboard: My Checked Out Content
- From your Modern Campus CMS Dashboard, you will see an area called “My Checked Out Content”. This will list any files that you currently have checked out.
- To Check In the file, click the lit light bulb icon to the left of the file name.
- Once you check in the file, the file name will disappear from the list.
-
If you do not have any files currently checked out, the list will be empty.
Gadget: My Checked Out Content
- Find your Gadgets sidebar on the right of Modern Campus CMS.
- If the Gadgets icon is collapsed, click the “Show Gadgets” icon (a plug) to expand the menu.
- Find the “My Checked Out Content” gadget from the list. Click the caret icon to expand the gadget.
- This gadget will show you a list of all files you currently have Checked Out.
- To Check In the file, click the lit light bulb icon to the left of the file name
- Once you check in the file, the file name will disappear from the list.
-
If you do not have any files currently checked out, the list in the gadget will be empty.
When you Submit the Page for Approval
When a page is submitted for an approval, the page will automatically be checked out to the approver. The Pending Approval status will show in both the user and approver's Workflow. No other action is needed.
If the page you are trying to edit is checked out by another user, you will not be able to edit the page until they check it in. This prevents users from editing pages at the same time and overriding each other’s changes.
- When you go to a page that is checked out, you will see a red padlock icon and will not be able to check out the content.
- Hover your mouse over the red padlock to see the name of the user that has the content checked out.
- Contact the user who has the content checked out and ask them to check in the page if they are completed with their edits.